Intermediate databases - Epita 2025

Setting up your local install
Today
- setting up you local install
- postgres configuration files
- RDBMS architecture
- loading a dataset into a new database table
- backup, dump and restore a database
Prerequisites
You should have
- a running postgresql 17 or 16 install on your machine
- and/or pgAdmin installed
Server vs databases
You connect to a postgres server
On that server you may have zero, one or multiple databases.
When you launch postgres on your local, you are actually launching the postgres server.
You connect and query the database on the command line using psql or in pgAdmin.

Users
The postgres user is the super user.
It can do anything on the server, create and manage databases, users, drop everything etc … handle with caution.
Installing postgreSQL also creates a user with your machine user name : alexis in my case
The username (alexis) user is not as powerful as the postgres user
Attention, on Mac, there is no postgres user.
The superuser is your username
users and privileges
What are Privileges?
Privileges are permissions that control what actions a user can perform in PostgreSQL. Think of them as “rights” or “allowed actions” : like SELECT (reading data), INSERT (adding data), or CREATE (making new objects).
Similar to file permissions on a Linux system.
PostgreSQL User Access Levels
- Superuser: Can do everything. create/drop databases, create roles, bypass all permission checks. Typically the
postgresuser. - Database Owner : Full control over a specific database. can drop it, grant permissions on it, create schemas within it.
- Schema Owner : Controls a schema within a database. Can create/drop tables and other objects in that schema.
- Table Permissions: Granular access to specific tables.
SELECT(read),INSERT(add rows),UPDATE(modify),DELETE(remove rows). - Role Membership: Users can inherit permissions from roles (groups) they belong to. Roles can be nested.
- PUBLIC: Default role that all users belong to. By default, has
CONNECTandTEMPprivileges on databases. - Connection Privileges: Must have
CONNECTpermission on a database to access it at all. Can be revoked to block access entirely.
What is TEMP privilege?
TEMP (or TEMPORARY) privilege allows a user to create temporary tables in a database.
- Temporary tables exist only for the duration of your database session
- They’re automatically deleted when you disconnect
- Useful for storing intermediate results during complex queries
- Don’t conflict with other users’ temp tables (each session has its own temp space)
Example:
-- With TEMP privilege, you can do this:
CREATE TEMP TABLE my_temp_data (
    id INT,
    value TEXT
);
-- This table disappears when you disconnect
So when PUBLIC has TEMP privilege by default, it means any user who connects to the database can create temporary tables for their work session.
Connecting to the server
You can connect in the terminal or with pgAdmin
In the terminal you use psql to connect
psql takes the following parameters
-Uusername-hhost (IP address or local host)-pport-ddatabase_name
PostgreSQL port is by default 5432 and does not have to be specified each time.
Examples
So to connect to a local instance of a postgres server with user bob and database database_name
psql -U bob -d database_name
To connect to a remote server IP: 123.456.789.246, same user and database
psql -U bob -h 123.456.789.246 -d database_name
How to check your connection
to see your current connection status run
psql -c "\conninfo"
if it complains, add postgres as the database name
psql -c "\conninfo" -d postgres
This should return:
You are connected to database “postgres” as user “alexis” via socket in “/tmp” at port “5432”.
Connect to the server in pgAdmin
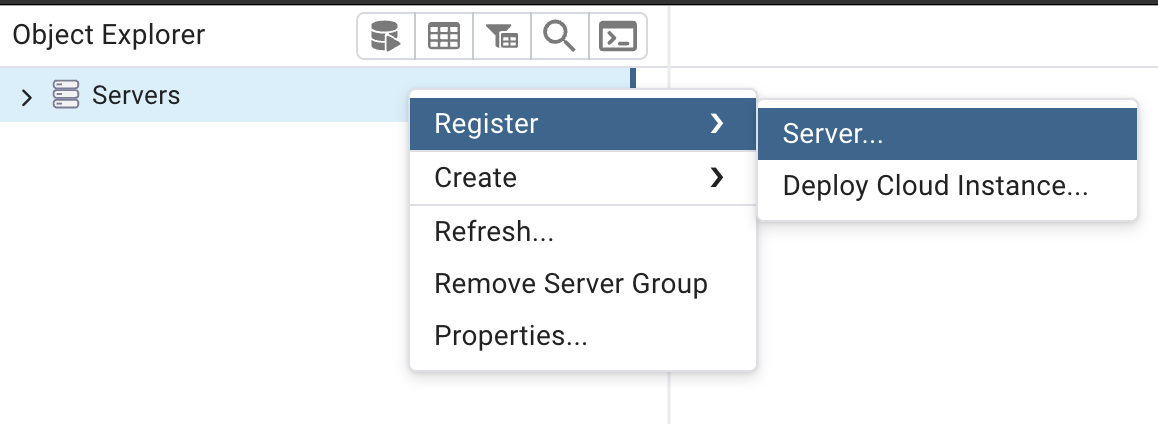
- Open pgAdmin
- Right-click on “Servers” in the left panel and choose “Create” ```bash “Server…”
- In the “Create - Server” dialog:
General tab:
Name: Give it a name like “Local PostgreSQL”
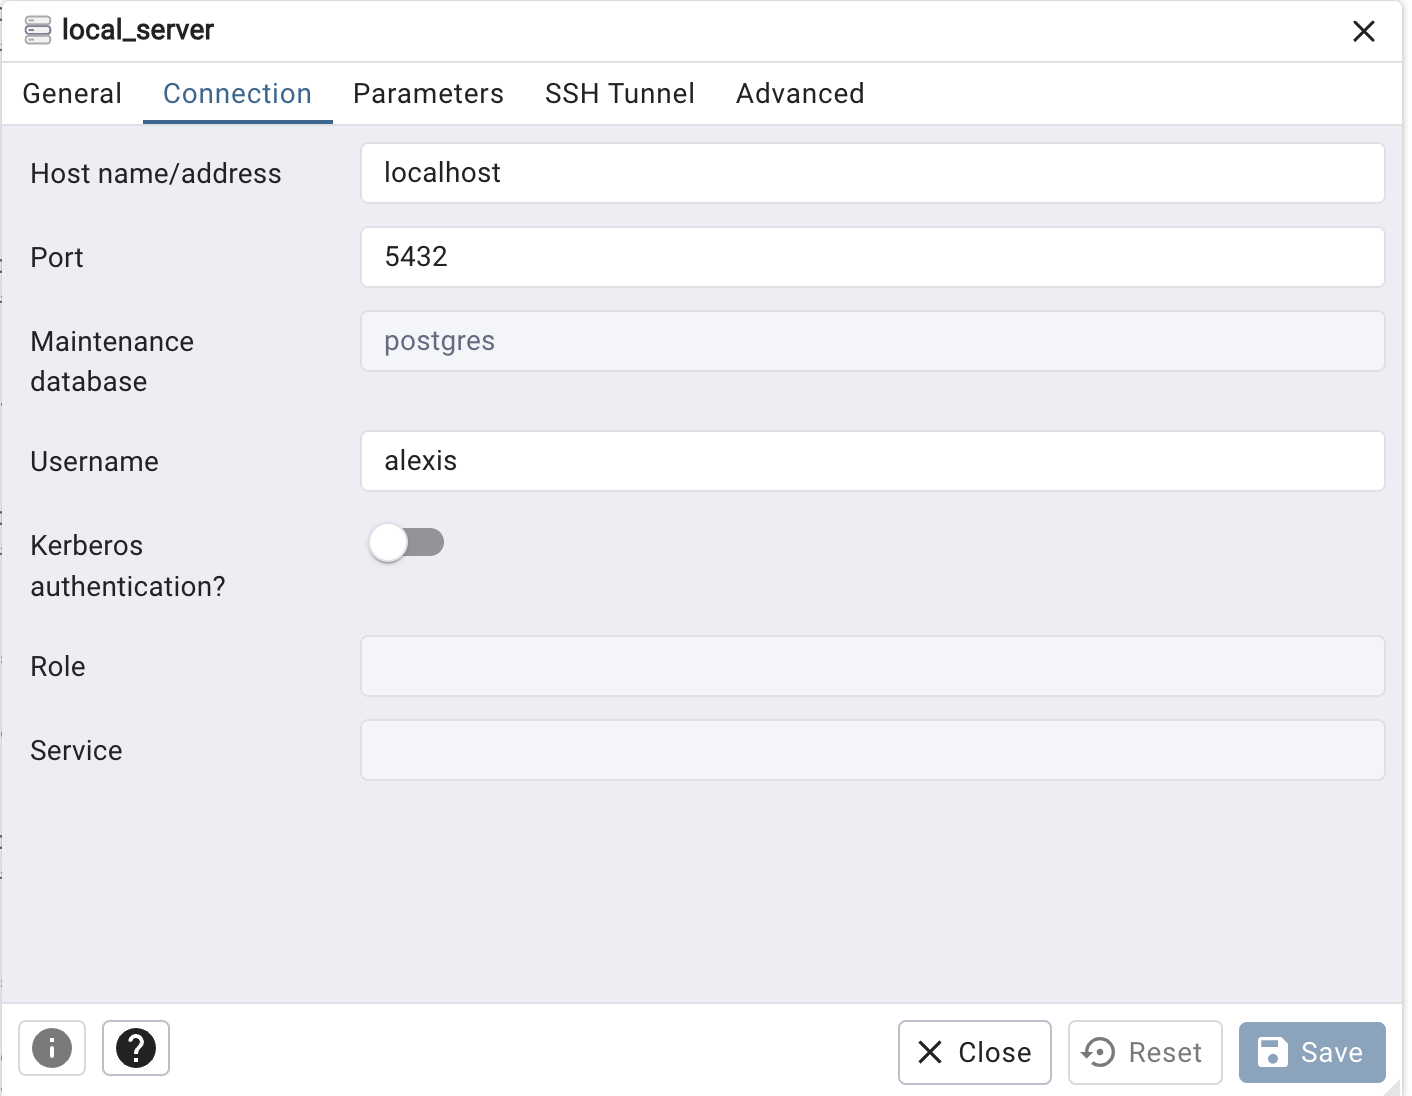
Connection tab:
Host name/address: localhostPort: 5432 (default PostgreSQL port)Maintenance database: postgresUsername: your_usernamePassword: Leave blank if you haven’t set one
to connect to a remote server, just change the connection tab parameters (host, user, password)
On windows
- Install postgres and follow the instructions
- click on the
psql.exefile -
it will open a terminal window and prompt you with hostname
- if you’re connecting on local just press enter
- if you’re connecting to remote add the IP address
Same with the other parameters
server configuration
There are 2 configuration files for a postgres server
- postgresql.conf : manages how the server operates
- pg_hba.conf : manages who can connect and how they authenticate
You have to restart your server everytime you modify these files
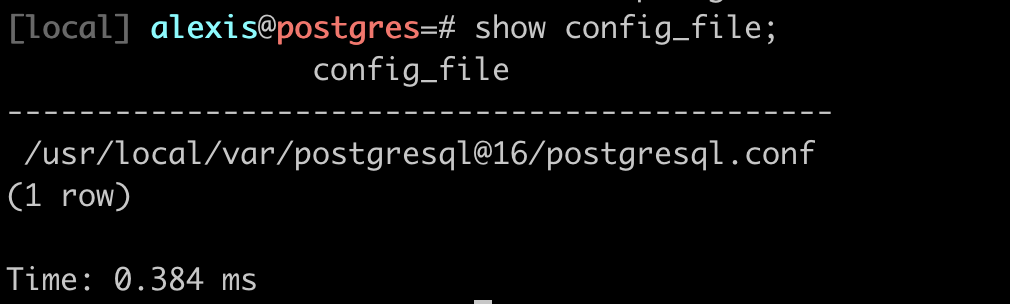
Config file location
Find the location of the postgresql.conf file with show config_file; in a PSQL session
similarly for the pg_hba.conf file with show hba_file; in a PSQL session

postgresql.conf
General server configuration
This file controls most of the global settings for the PostgreSQL server. It includes:
- Resource allocation (memory, CPU)
- Default storage locations
- Replication settings
- Client connection defaults
- Query planner settings
- Logging and statistics
- Autovacuum settings
- Client/server communication parameters
- Locale and formatting
- Error handling
Key points:
- Affects the overall behavior and performance of the PostgreSQL server
- Changes typically require a server restart to take effect
- Located in the data directory
Example settings:
max_connections = 100shared_buffers = 128MBlog_destination = 'stderr'
important parameters in postgresql.conf
max_connections = 100- Only 100 clients (users, applications, etc.) can be connected to the server at the same time.
- Connection attempt
#101gets rejected withtoo many connectionserror - Includes: All connections - active queries, idle sessions, background processes
- Default: Usually 100 on most installations
- Trade-off: Higher values = more memory usage (each connection uses ~10MB)
shared_buffers = 128MB- Amount of memory dedicated to caching database blocks
- For local use, 128-256MB is fine
work_mem = 4MB- Memory per query operation (sorts, joins). Can increase to 8-16MB for complex queries
important parameters in postgresql.conf
Logging (for development/debugging)
log_statement = 'all': Logs every SQL query (useful for learning/debugging)log_line_prefix = '%t [%p]: ': Adds timestamp and process ID to logslogging_collector = on: Enables log file collection
Performance
effective_cache_size = 4GB: guide to query planner about total available memory. Set to ~50-75% of your RAMrandom_page_cost = 4.0: Set to 1.1 for SSD drives (makes queries faster on SSDs)
commented out values
When a line is commented out in postgresql.conf, PostgreSQL uses its built-in default value.
- PostgreSQL has hardcoded defaults for every parameter
- The config file shows common settings but leaves them commented to use defaults
- This keeps the config cleaner: you only uncomment what you need to change
pg_hba.conf
Role: Client authentication control
This file controls WHO can connect, FROM WHERE, to WHICH database, and HOW they authenticate.
“HBA” stands for “host-based authentication”.
It specifies:
- Which hosts can connect
- Which database they can connect to
- Which PostgreSQL user names they can use
- How clients are authenticated (password, ident, trust, etc.)
Key points:
- Controls access at a very granular level
- Critical for security management
Example entries:
# TYPE DATABASE USER ADDRESS METHOD
local all postgres peer
host all all 127.0.0.1/32 md5
host production app_user 192.168.1.0/24 scram-sha-256
pg_hba.conf parameters
File Format (each line):
TYPE DATABASE USER ADDRESS METHOD
Common Entry Types:
# Local Unix socket connections
local   all         all                     trust      # No password (dangerous!)
local   all         all                     md5        # Password required
local   all         all                     peer       # OS username must match

# TCP/IP connections from localhost
host    all         all     127.0.0.1/32    md5        # IPv4 local
host    all         all     ::1/128         md5        # IPv6 local

# Allow specific user to specific database
host    myapp_db    john    192.168.1.0/24  md5        # John from local network

# Allow connections from any IP (careful!)
host    all         all     0.0.0.0/0       md5        # Any IPv4
Connection Types:
- local: Unix socket (no network)
- host: TCP/IP with or without SSL
- hostssl: TCP/IP with SSL only
Authentication Methods:
- trust: No password (only for development!)
- md5: Password-based (older but common)
- scram-sha-256: Password-based (more secure, newer)
- peer: OS username matches DB username (local only)
- reject: Deny connection
Important:
- Rules are checked top-to-bottom, first match wins
- After editing, run
pg_ctl reloadorSELECT pg_reload_conf();
.psqlrc
.psqlrc is a local configuration file for the psql command-line interface in PostgreSQL.
It allows you to customize your psql environment and set default behaviors.
- Usually located in your home directory:
~/.psqlrcon Unix-like systems - On Windows:
%APPDATA%\postgresql\psqlrc.conf - Customizes the psql environment
- Sets default options and behaviors
- Runs commands automatically when psql starts
Example
always timing the queries
- pager mode
- expanded mode
- Set default pager:
\pset pager always - Set line style:
\pset linestyle unicode - Set timing on:
\timing - Set expanded auto mode:
\x auto - Custom prompt:
\set PROMPT1 '%[%033[1m%]%M %n@%/%R%[%033[0m%]%# - History settings:
\set HISTSIZE 2000 - History settings:
\set HISTCONTROL ignoredups - Enable verbose error reports:
\set VERBOSITY verbose